Prepping Your RV For Cold Weather: Winterization Tips
 Owning an RV can be a lot of fun for the whole family, and taking care of your motorhome year-round is a necessary and important activity for ensuring that all your careful vacation planning pays off each year for more of that family fun. Once the weather drops into the 30s and 40s, it’s important to winterize your RV as soon as possible. When it falls below freezing – 32 degrees Fahrenheit – you run the risk of having water freeze in your pipes, tanks, or water heater. If this happens, due to the expansive nature of water when it becomes ice – you can potentially have severe damage to your RV systems that will be costly to repair.
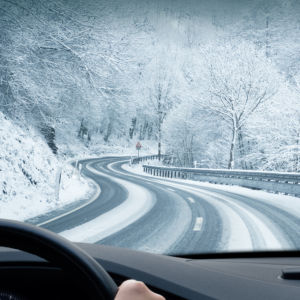
In addition to the risk of freezing pipes, condensation can collect on your RV glass – forming foggy RV windows that could potentially be extremely damaging to your RV as well. You see, if your RV windows have seen some mileage, the seal between the glass panes may be deteriorating, allowing moisture to seep inside the windows. That moisture can be trapped for some time, causing a process called etching to occur. This not only damages the glass window surface, but it also slowly decreases the visibility of the glass.
Check out our blog post on When to Repair or Replace Your Foggy RV Windows for more information on which service your RV may require at this point.
RV Winterization Tips – Prep Now and Play Later
Before beginning to winterize your RV, it’s important to follow these two safety prerequisites in order to reduce the risk of injury:
- Shut off all electricity and water pumps within your recreational vehicle
- Allow your RV water heater’s water supply to cool completely
Here are some tips our team collected that will help you to winterize your RV for next year’s adventures.
RV Exterior Winterization
- Inspect the roof for leaks and reseal any cracks. You’ll need a clear, sunny day for this or a large garage space indoors.
- Inspect the windows and windshield for any cracks or fogging, and repair or replace accordingly.
- Drain and sanitize the fresh, black, and grey water tanks of you RV in that order.
- Inspect the water system and repair any cracks or leaks.
- Place covers on the exterior vents, including the skylight and A/C units.
- Insulate exposed pipes, water lines, and hoses with heat tape or insulating foam.
- Warm and insulate the water tanks.
- Lubricate exposed metal such as bolts, joints, latches, stairs, frames and chains. Even WD-40 can help here.
- Top off the gas tank, oil, radiator, and any other fluids–make sure you add fuel stabilizer to the gas.
- Place the RV on jacks and remove the tires to prevent flat spots.
RV Interior Winterization
- Insulate the windows and doors by applying heat shrink to the windows and heat tape around the door frame.
- Insulate interior vent holes with foam pillows.
- Keep a dehumidifier running to prevent moisture build-up. You can use a timer for this task to minimize the electrical usage over the course of the winter.
- If your RV has a built-in refrigerator, don’t forget to defrost it and remove all the melted ice from within its cabinet. Keeping its door open so as to not generate mold is a good idea as well.
Protecting Your RV Battery
If your RV battery sits completely idle over winter, it will lose some of its charge. If a battery’s charge is too low, it can actually damage the battery itself—making it nearly impossible to avoid having to purchase a new one before starting up on the road again next Spring.
A good way to avoid killing your motorhome’s battery is through ‘trickle charging.’ Trickle charging is perfect for lead acid batteries that will be sitting idle for some time, as this type of charge will very slowly recharge the battery as time goes on.
When you store your RV battery at the end of the season, make sure it has a full charge. In order to maintain its charge during storage, find a charger that will trickle when it’s down, but will stop automatically when it’s full. This will prevent overcharging and you won’t have to constantly check it over the winter. Trickle chargers test the battery to determine its charge, and then determine what type of charge it needs. It will even determine the amount of sulfation in the battery and give it a special kind of charge to break it down. One thing to keep in mind is that it works best between 33-130°F, so if you live in a cold place, make sure you store your battery where it won’t dip below that temperature.
Trust Custom Glass Solutions for Foggy RV Windows
Custom Glass Solutions, LLC. helps you repair or replace cracked, damaged, and even foggy RV windows in no time at all, should that be one of your needs this winterization season. We offer the best nationwide service for repairing and replacing damaged RV glass systems, and are eager to help you prepare for the cold weather ahead. We work with a network of glass shops across the country to help our customers get RV windshield replacement and repairs – even while you’re out on the road traveling, so you never have to cancel another trip due to unforeseen damage again.
Contact us by filling out the form here or by calling us toll-free at (855) 782-5246 to get started with our services and glass products. Custom Glass Solutions is ready to help you winterize your RV and make the most out of any holiday or family trip you might be planning to take for the upcoming season. Enjoy your winterization process and think ahead for the great trips coming next year!
Written by Matt Eder
